How to set up gmail to send and receive emails using your domain name
In this blog post, I’ll show you ways to line up Gmail together with your custom email for free of charge. While Gmail a part of this method is 100% free, there are some caveats to the present method therein you’ll get to have already got email hosting to form it works. Typically, you'd get this through your web host if you've got an internet site.
 1. Create a free Gmail account
To get started, create a free Gmail account – e.g. username@gmail.com. If you have already got a Gmail account, you'll use your existing account.
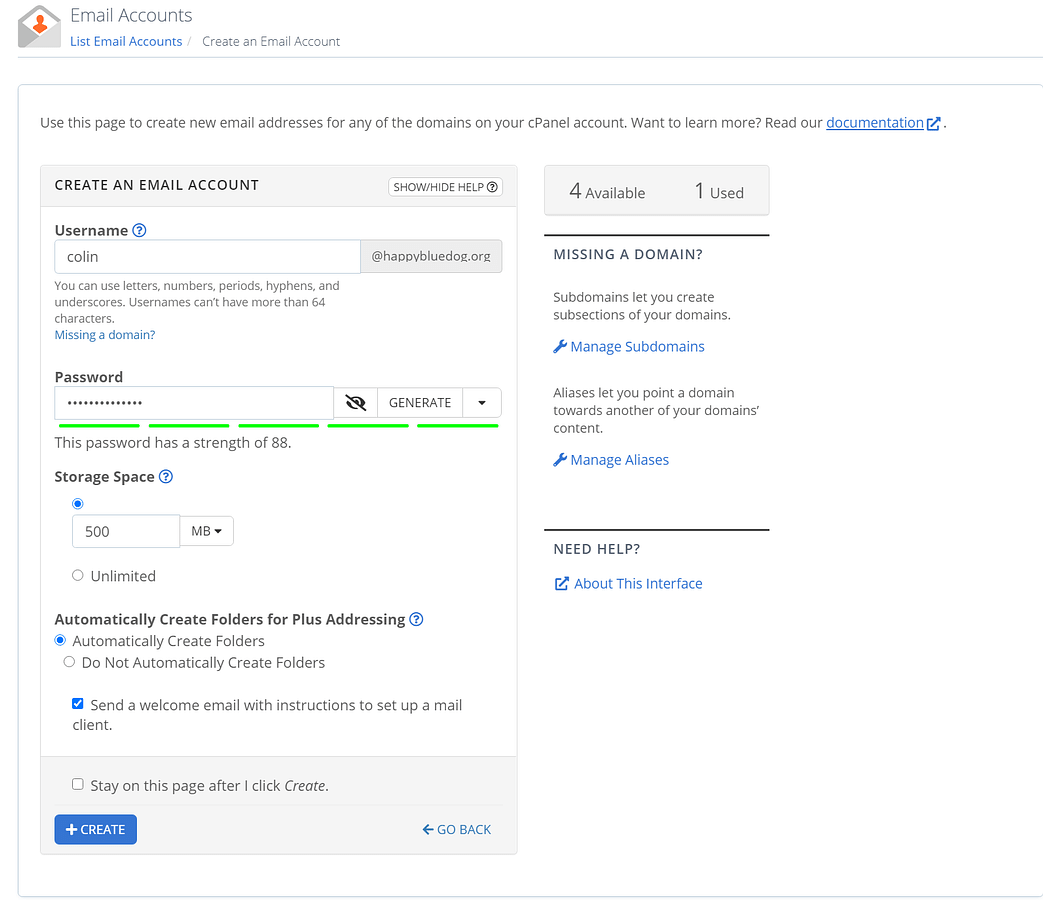
2. Create your custom email address via your email hosting
Then, you need to make your custom email address utilizing your email facilitating in the event that you haven't done so as of now. For example you@domainname.com.
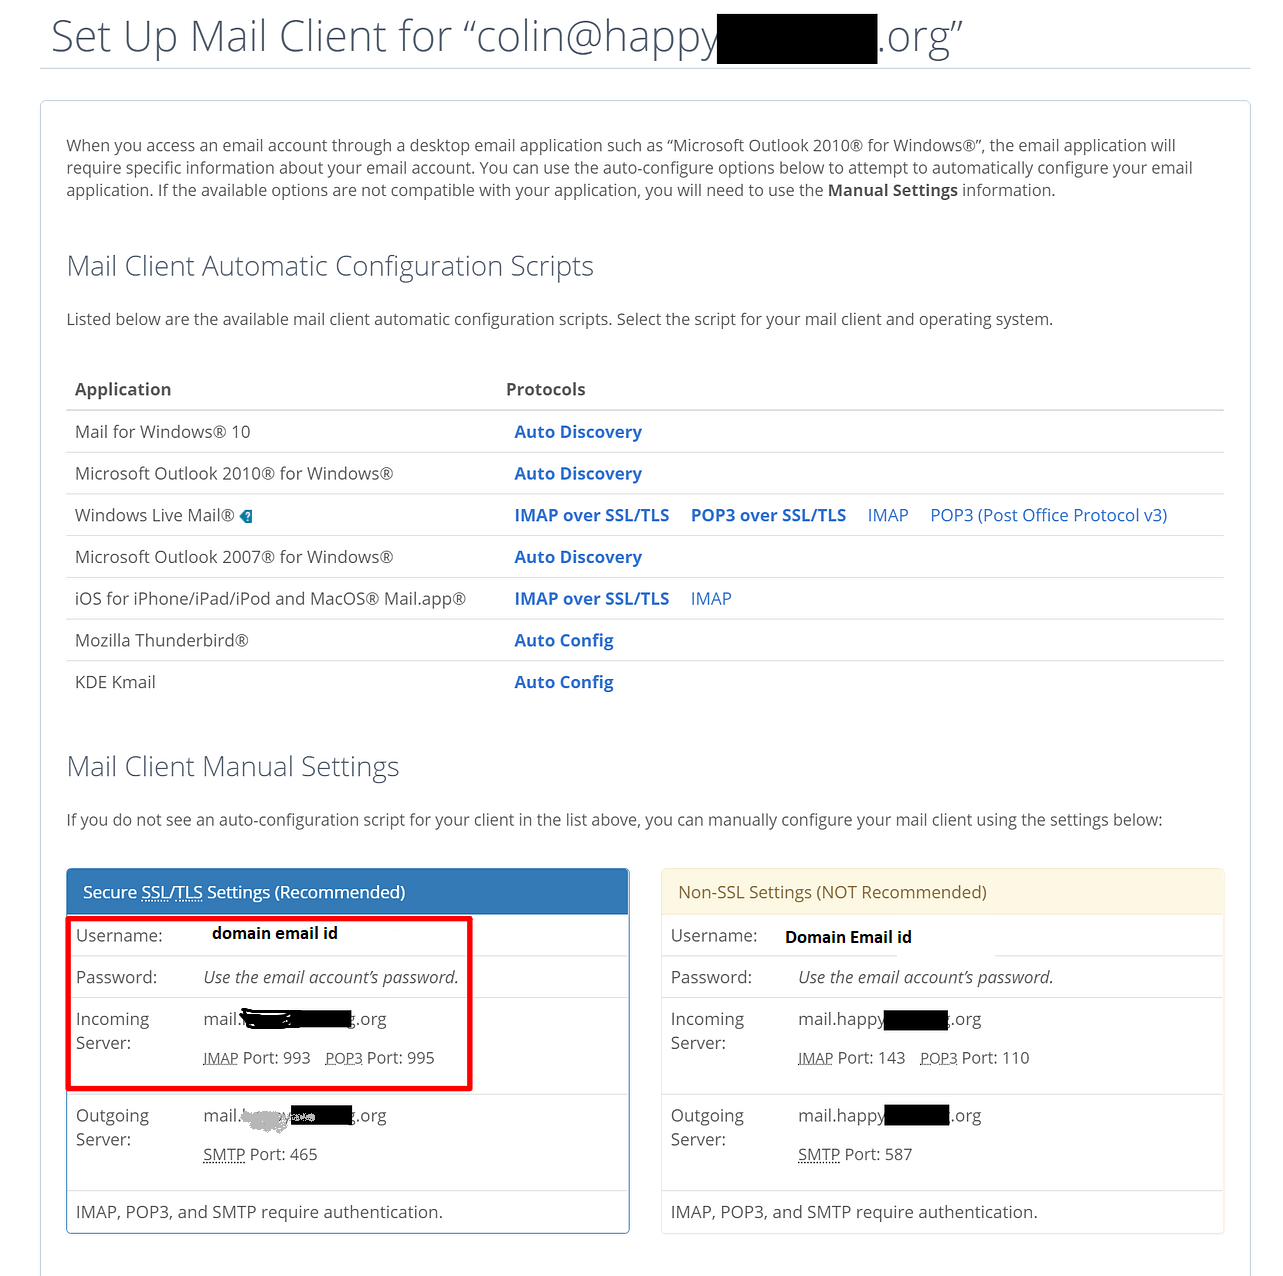
3. Checking Connection Setting and Property
To begin, you need to discover your email's POP3 settings. you can do this by tapping the Connect Devices tab when you're altering your email account. This is what it would appear that check screen short below
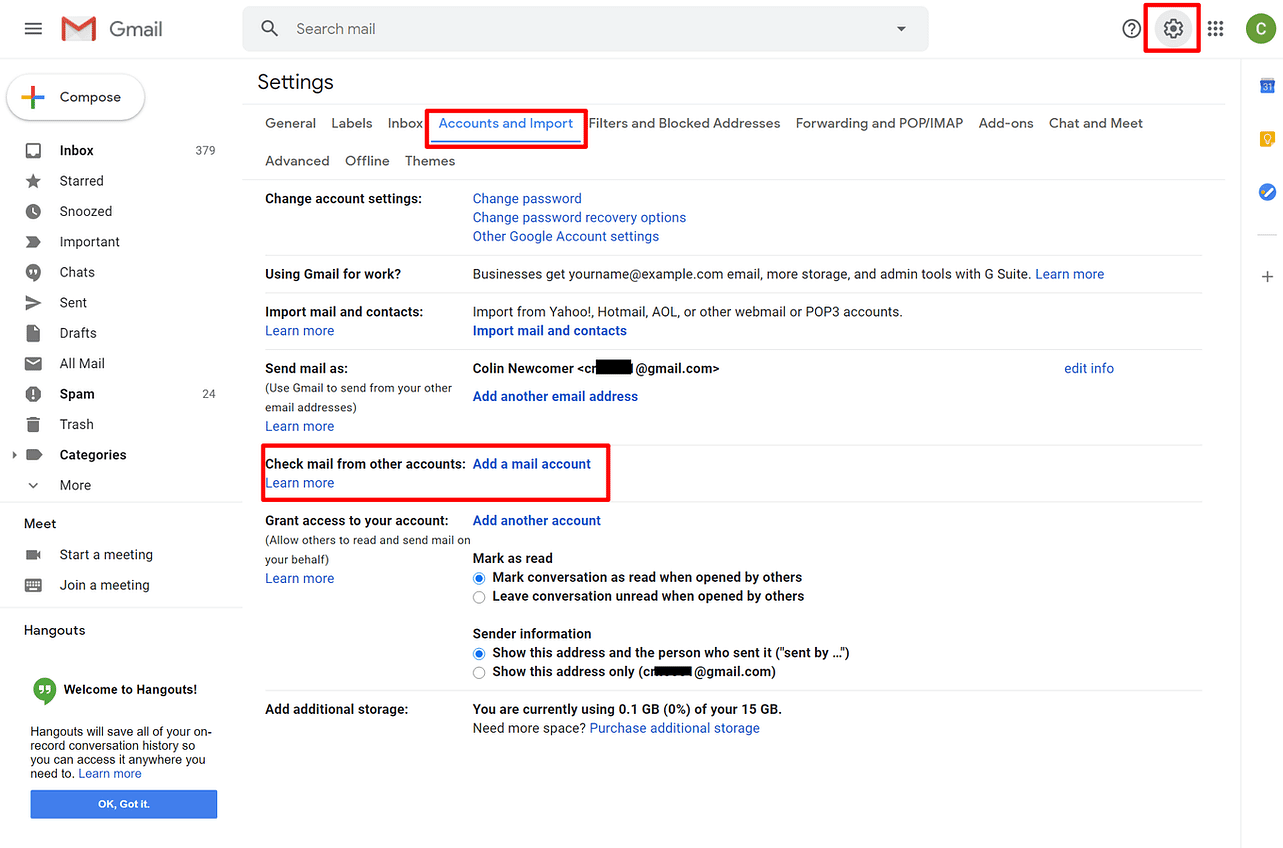
4. Connection and Adding Your Domain email Account in Google
Open Gmail and do the Following Steps
- the top-right corner and selecting See all settings.
- Go to the Accounts and Import tab.
- Find the Check mail from other accounts settings.
- Click Add a mail account.
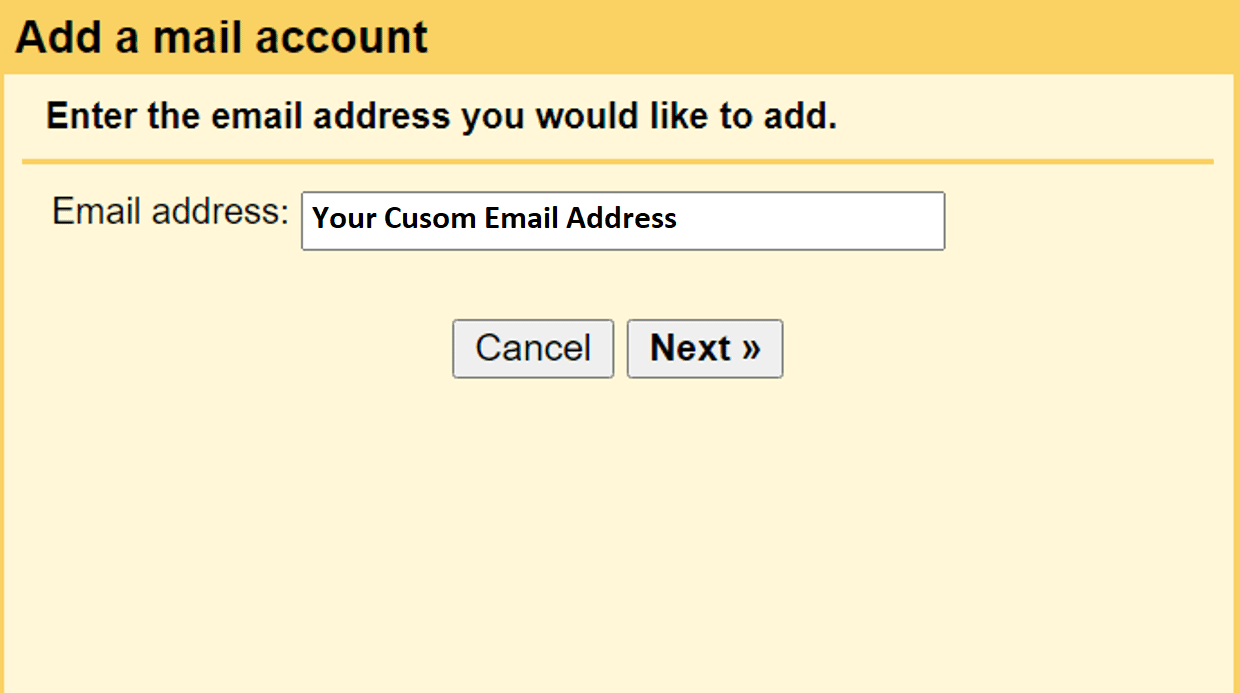
 In the first step, enter your custom email address – e.g. you@domainname.com
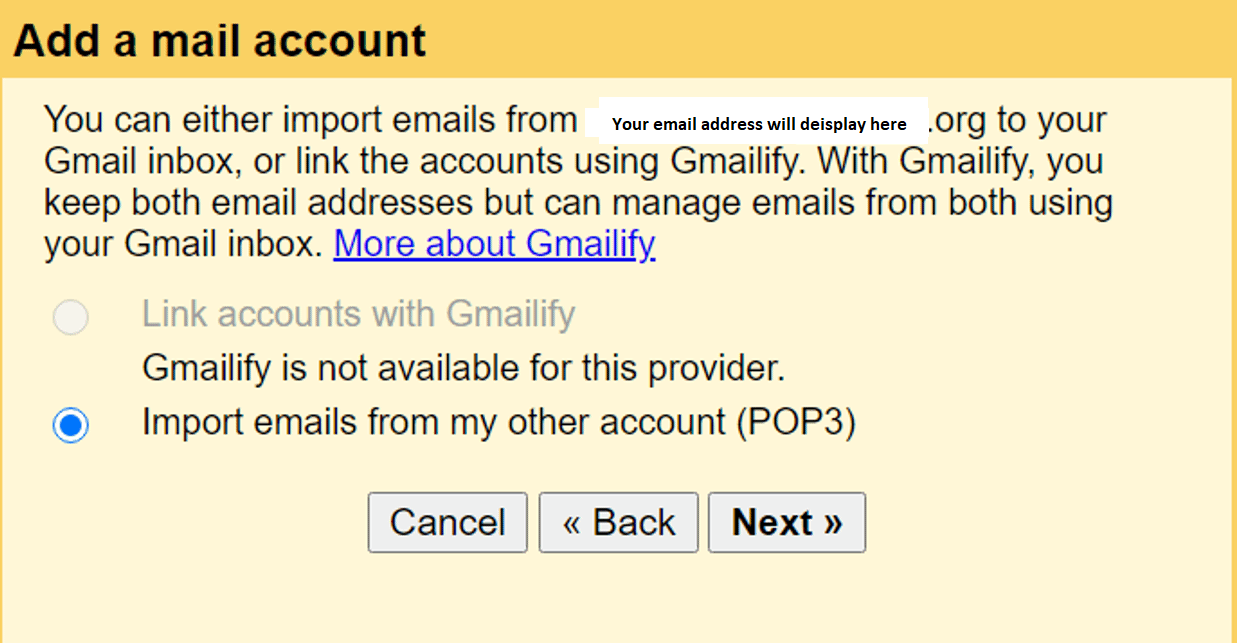
 The second step, choose Import emails from my other account (POP3):
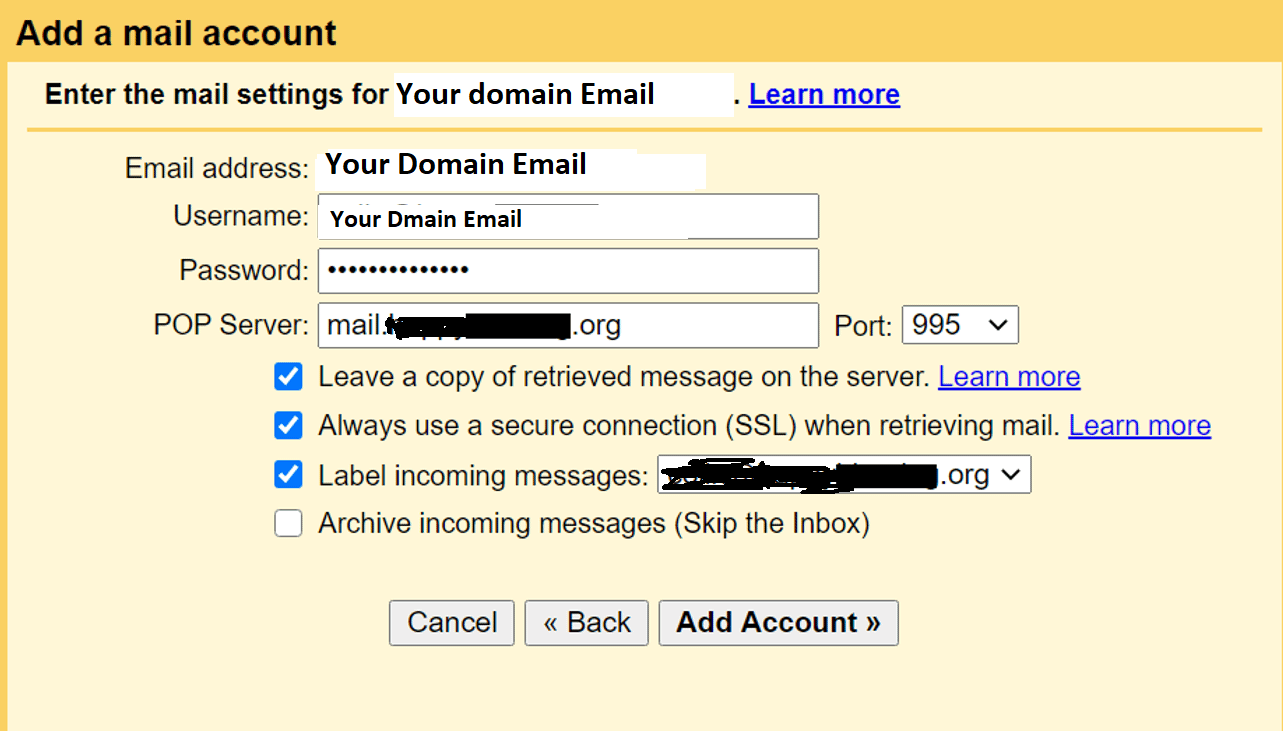
Enter the following information:
- Username – normally, this is your full email address, but sometimes it’s only the part that comes before @.
- Password – The password that you set when creating your custom email address.
- POP Server and Port – from your email host.
- Check the Leave a copy… box.
- Check the Always use a secure connection… box.
- Optionally choose to add a label.
- Click Add Account to finish the process.
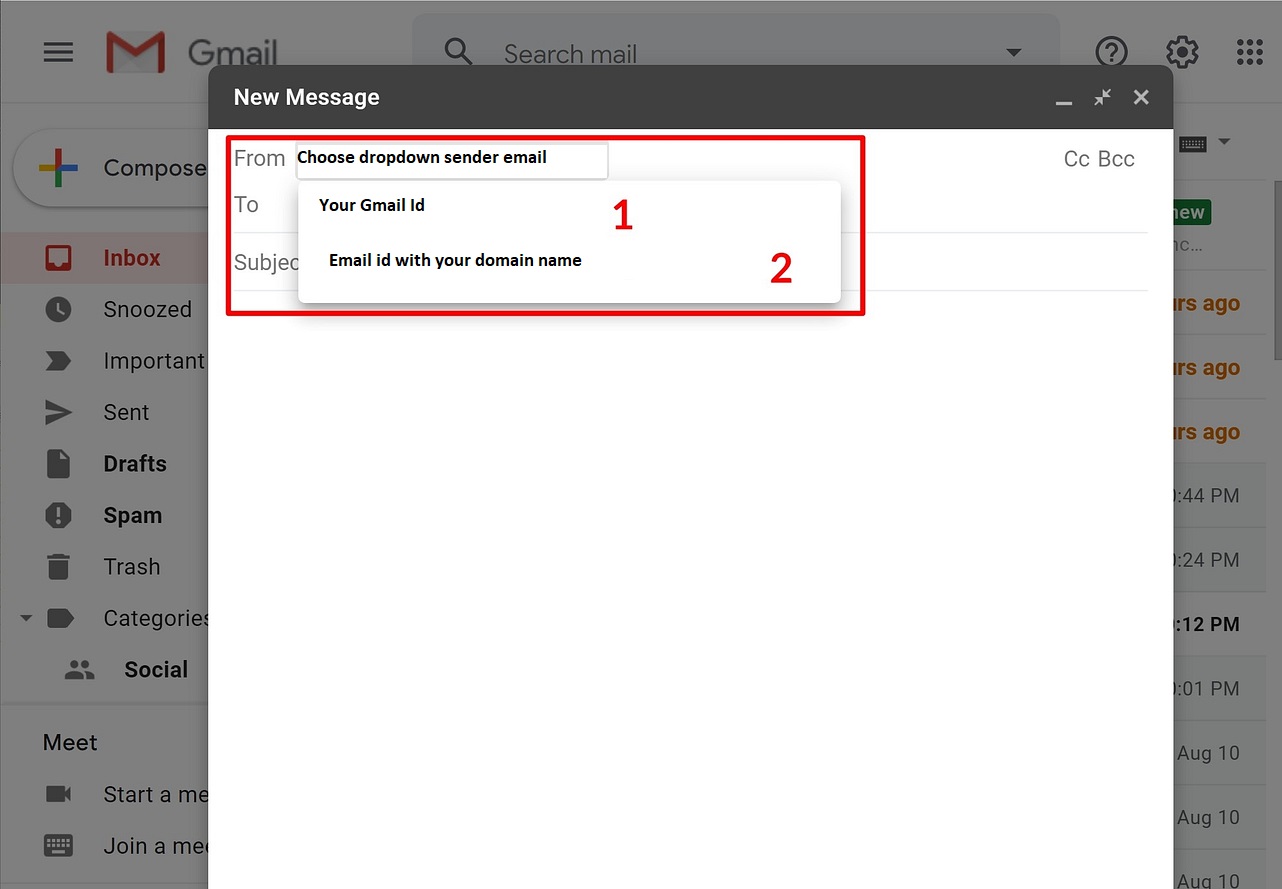
5.Allow Gmail to send emails using SMTP
At this point, new emails to your custom domain should show up in your Gmail account. However, you won’t be able to reply to them from your custom email domain yet.
Once you have your SMTP information:
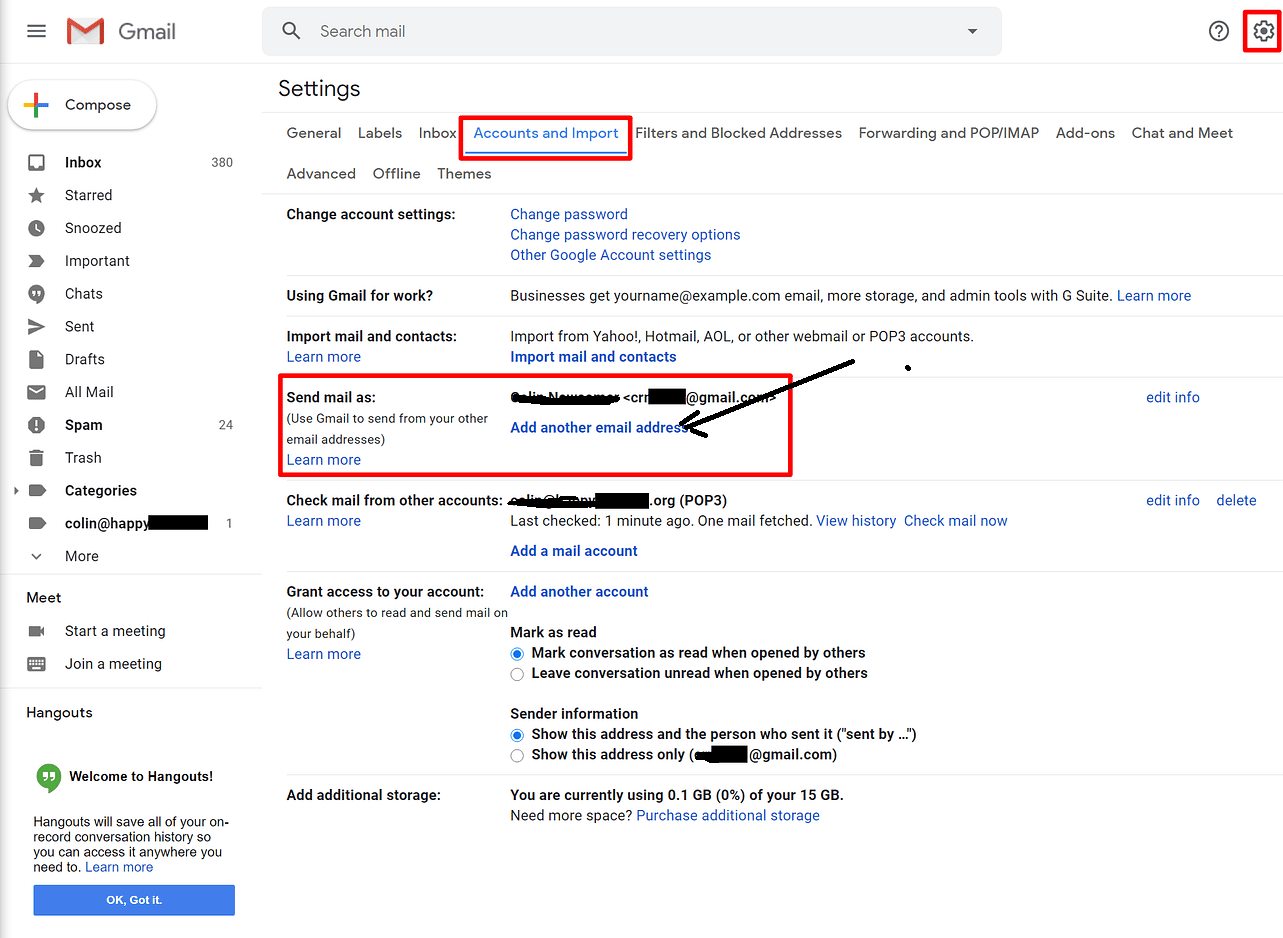
- Go back to the Accounts and Import area in your Gmail account’s settings.
- Find the Send mail as setting.
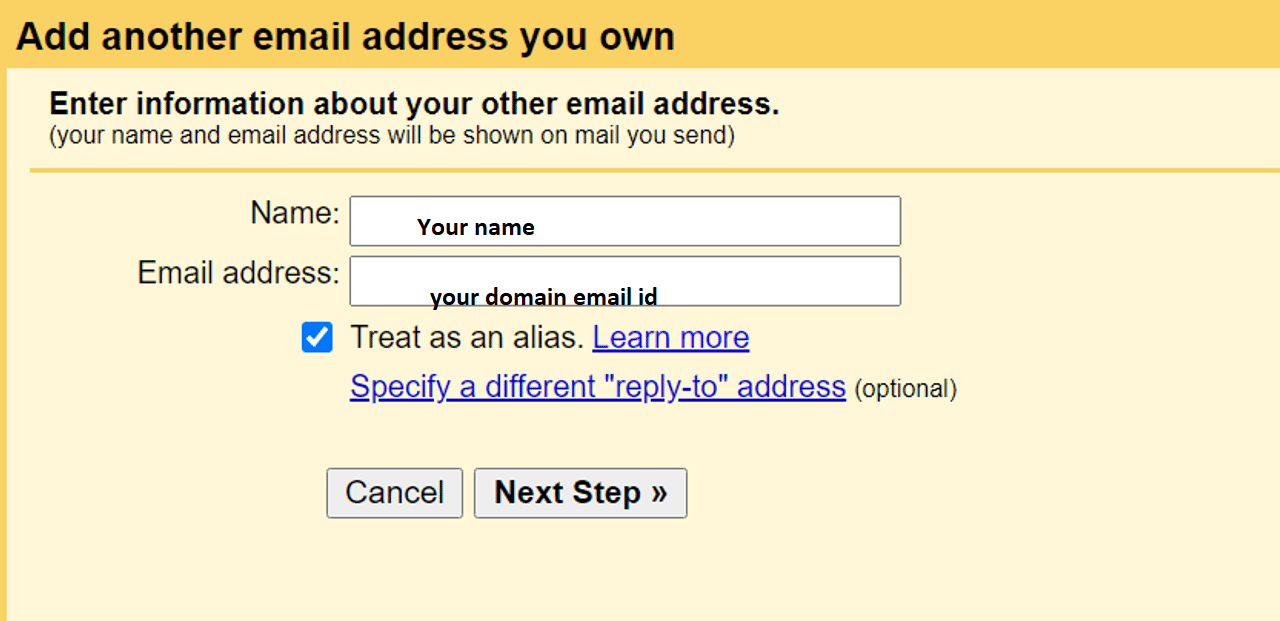
- Click Add another email.
- Enter your name.
- Enter the custom email address that you’re using.
- Check the box for Treat as an alias.
Next, enter the SMTP information from your email host:
- SMTP Server and Port – from your email host.
- Username – normally, this is your full email address, but sometimes it’s only the part that comes before @.
- Password – The password that you set when creating your custom email address.
- Choose whichever Secured connection method that Gmail recommends.
- Click Add Account
Enter OTP and Verify the Domain name with Google Now you can send and receive email through google with your own domain name